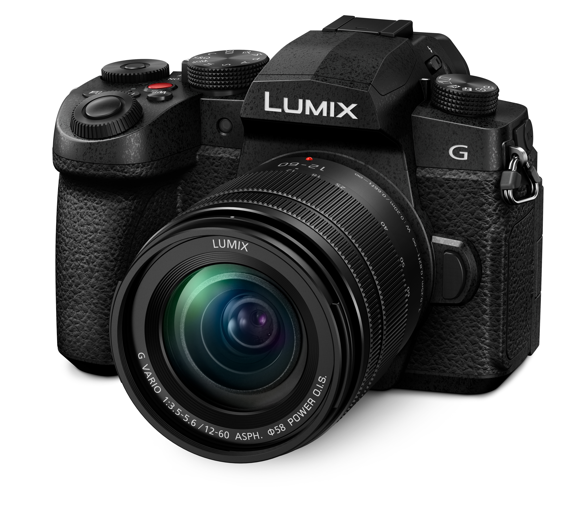
The new LUMIX G97 camera balances high performance and simplicity, giving creators the tools to elevate their photography and video skills.
Superb picture quality
The 20.3MP CMOS sensor,(估计还是老汤底)combined with the high-performance Image processor, delivers superb image quality with vibrant colors and sharp details.
Equipped with LUMIX Photo Style feature, (不是Lut功能)users can fine-tune their images with a variety of color effect options, ensuring every shot matches your creative vision.
The Live View Composite feature is also included, providing the ability to combines multiple exposures in real time to create stunning light trails, star trails, or illuminated scenes without overexposing the background.
Smooth performance
The LUMIX G97’s 5-stop 5-axis Dual I.S.2*1(防抖没有升级)system ensures unrivalled stability, so your photos and videos remain sharp even in challenging conditions.
With 4K PHOTO capabilities, you can capture bursts of high-resolution photos at 30fps, ensuring you never miss a fleeting moment. The perfect shot from burst footage makes this feature ideal for fast-moving subjects or spontaneous scenes.
Versatile video features
Record in crisp 4K at 30p with no time limitations*2,(不限时录制好评,但你还是DFD呀) experiment with slow-motion (max.4x) or quick-motion (max.8x) in FHD, and create cinematic content with 12-stops of V-Log L.(有Vlog,但是L) Dedicated headphone and microphone jacks ensure total audio control while recording.
Intuitive operation and reliable design
With a 1,840k-dot free-angle LCD and 2,360k-dot OLED Live View Finder*3,(换屏幕了,好评!) the LUMIX G97 makes it easy to frame and focus your shots accurately, even in bright conditions.
The durable dust/splash-resistant*4 construction is ideal for everyday creators looking for a camera that can reliably handle a variety of situations.
Built-in Bluetooth® v5.0 and Wi-Fi make sharing and remote control effortless, while USB Type-C charging adds convenience.(先进的蓝牙5.0与Type-c确保这是21世纪20年代的产品)
Price and availability
The new LUMIX G97 will be available in late February 2024 for $849.99 for a 12-60mm lens kit (DC-G97MK) at valued channel partners.
*1 Based on the CIPA standard [Yaw/Pitch direction: focusing distance f=140mm (35mm camera equivalent f=280mm), when H-FSA14140 is used.]
*2 When the ambient temperature is high, the camera may stop the recording. Wait until the camera cools down.
*3 35mm camera equivalent
*4 Dust and Splash Resistant does not guarantee that damage will not occur if this camera is subjected to direct contact with dust and water
// Function to add Google Analytics
function add_google_analytics() {
    ?>
<!-- Google tag (gtag.js) -->
    <script async src="https://www.googletagmanager.com/gtag/js?id=GA_TRACKING_ID"></script> // 替换你的ID
    <script>
      window.dataLayer = window.dataLayer || [];
      function gtag(){dataLayer.push(arguments);}
      gtag('js', new Date());
      gtag('config', 'GA_TRACKING_ID'); // 替换你的ID
    </script>
    <!-- End Google Analytics -->
    <?php
}
add_action('wp_head', 'add_google_analytics');
Temba, his arms wide! In Tamarian this signifies the giving of a gift, first heard in the excellent episode Darmok. Data & Picard is my tribute to one of the greatest TV series of all time. It is an original track featuring the voices of Captain Picard (Patrick Stewart) and Commander Data (Brent Spiner), accompanied by a music video I shot entirely in my living room with a green screen and lights.
The track opens with the Klingon Victory Song, followed by a remix of Data singing Che Gelida Manina in the episode ‘In Theory’. This episode was the first ever to be directed by Patrick Stewart and I didn’t realize this until after the track was finished.
我是没看过星际迷航的,所以只能写一些关于本曲的感受:
第一次听:这是什么东西
第二次听:好像有点意思
第三次听:se la laaaa-sci riscaldar!
一种不知道哪里冒出来的,又老又新的奇特感受,同时异常洗脑。
关于本曲MV:
作者写道:
I sourced the Ben Nye makeup that was used to turn Spiner into Data, and a replica of the iconic Star Fleet uniform. Unfortunately I couldn’t get the contact lenses in and I could only get the uniform in red, so I spent a huge amount of time changing the colour of my eyes and uniform in post.
The video was shot in Slog 4k ProRes HQ using a Sony A7SII and an Atomos Ninja Flame. Lights included 3x Arri 800w Tungstens, 2x Socanland LED banks to light the screen, and one 2000w Blonde to simulate sunlight. BIG thanks to the guys at HD Rentals in Perth for helping me out.