分类: 学习笔记

  • 【Ai】在Windows系统本地部署DeepSeek-R1的极简步骤

    惊闻B站有人出售百元本地部署教程,NND给我看笑了,什么都能卖钱是吧,当然不排除人家手把手教,提供足够的情绪价值。

    但是如果你不想花钱,同时想提升一下英文水平和计算机熟练度,请跟着官方文档一步步进行,目前的文档已经相当详细且可行。

    我们如果在Windows上进行部署和调试,推荐使用Open WebUi+Ollama的方式进行部署。

    PS:其实更建议在Linux上进行部署,一键部署更加便利~

    1、选择后端Ollama

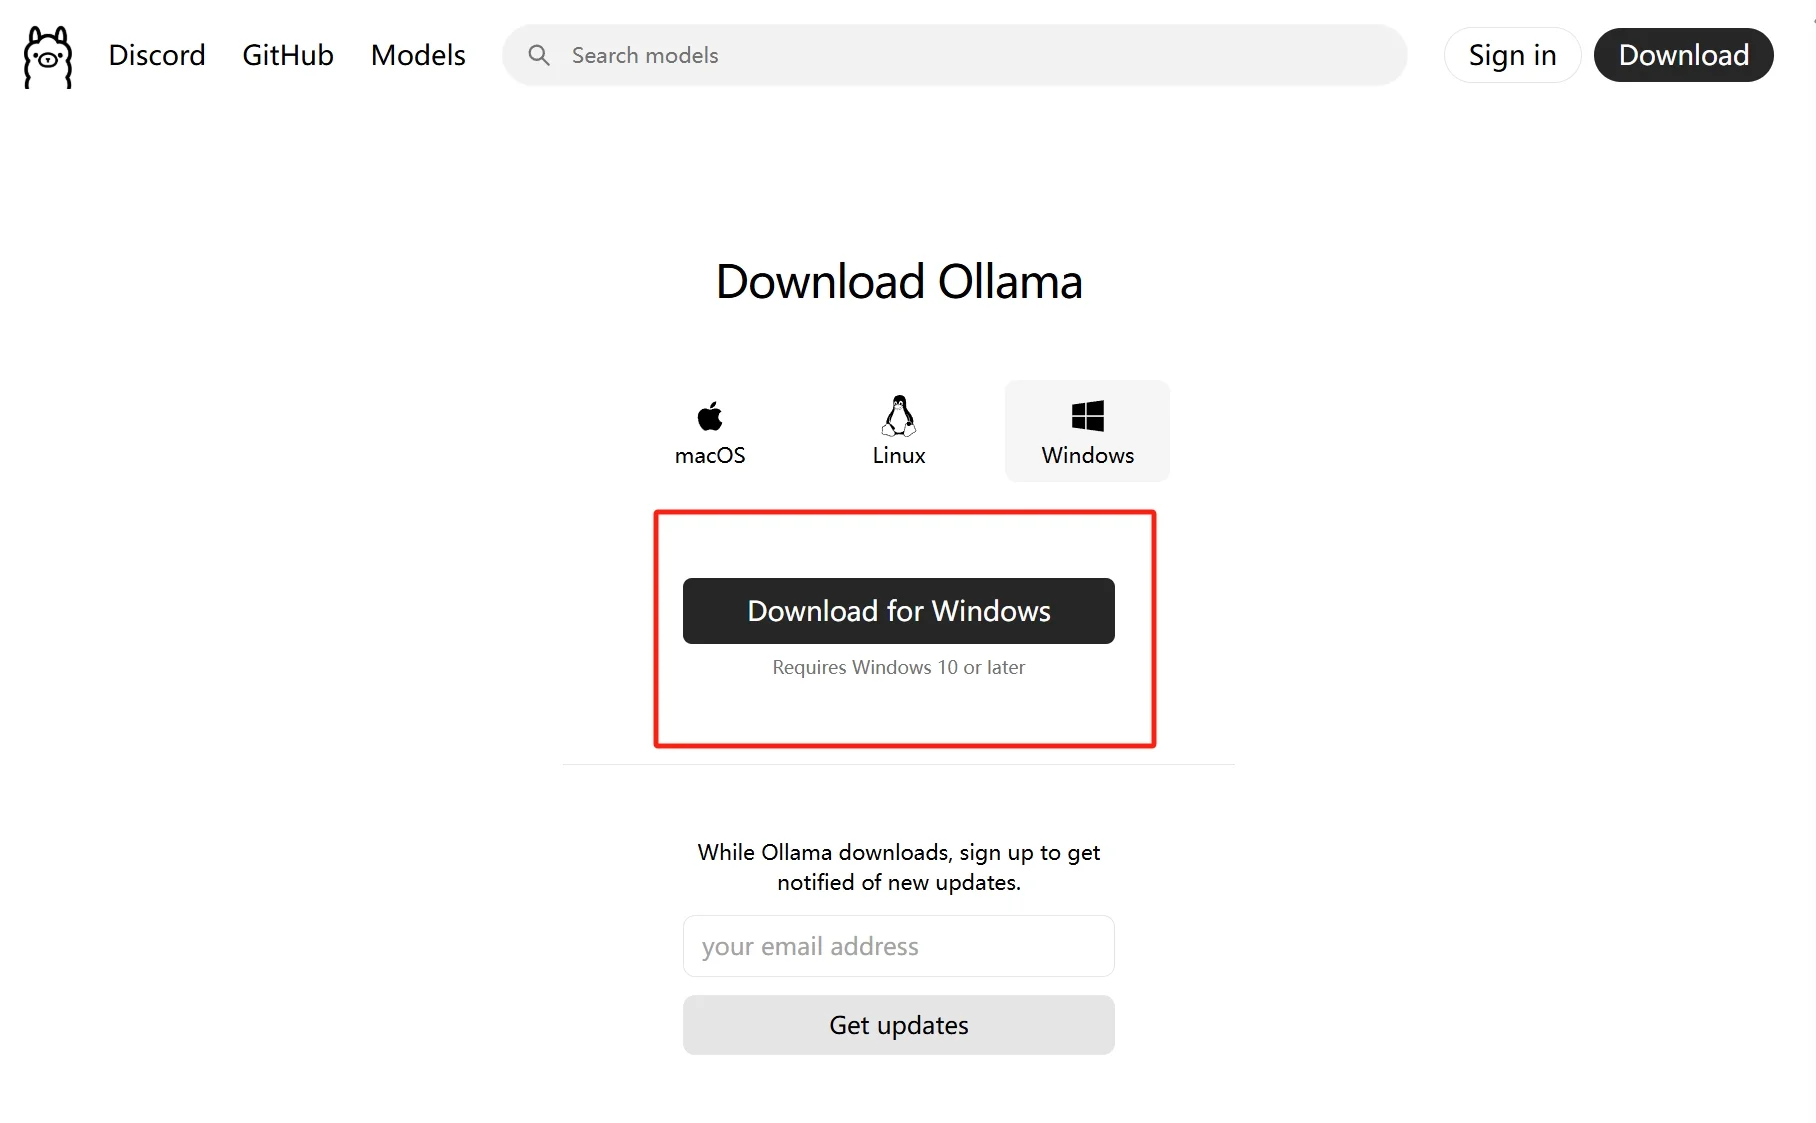
    在Ollama官网选择Win版本下载,会自动部署相关环境,在CMD或者中powershell可以按照对应的模型拉取到本地。

    请根据自己的硬件量力而行。我的显卡为RTX3070 8G,按照ollama默认设置,运行7B已经亚历山大。

    2、选择前端Open-WebUi

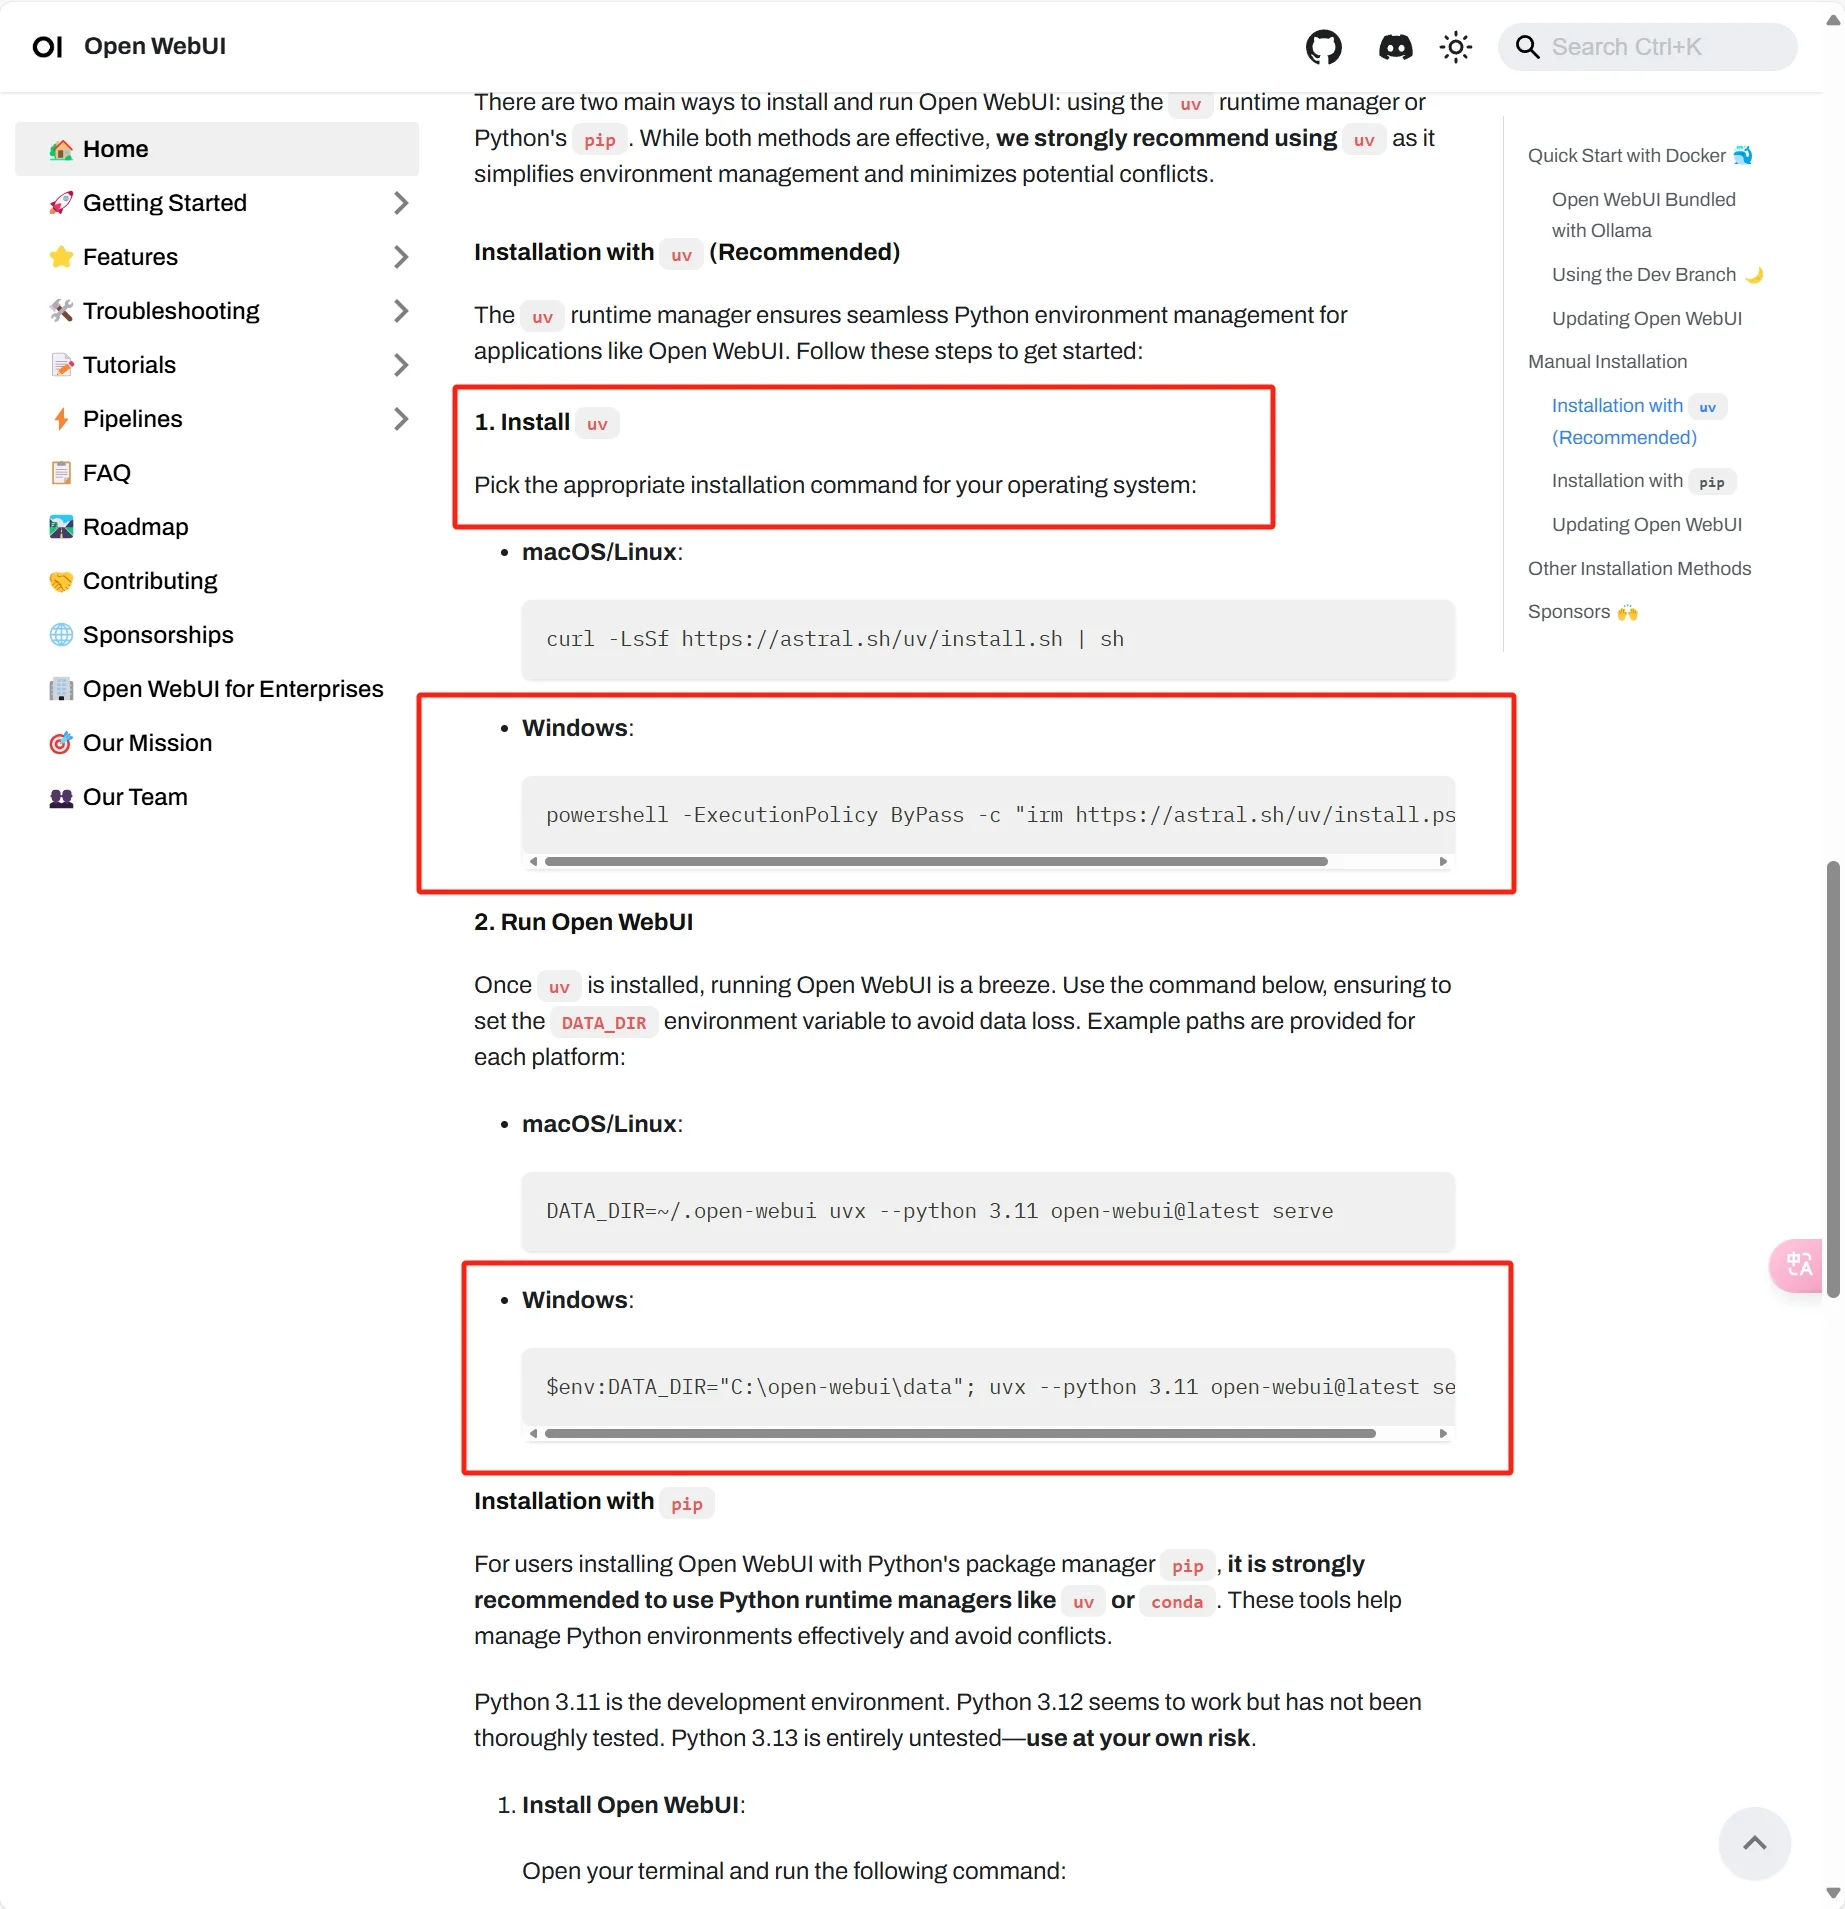
    请根据您的系统,在Open-WebUi的官方文档,按照步骤,一步步来进行部署。

    Win版本下按照官方建议,可以使用uv,在powershell中进行拉取和部署,其中对网络环境有一定要求。

    3、启动Open-WebUi后的注意事项

    Open-WebUi原版毕竟是国外软件,在国内这个环境启动还是有一点网络困扰的,尤其是有些文件是通过Github的地址获取的,请对自己的网络环境做出一些针对性的优化调整。

    另外完成本地部署后,如果是启动在127.0.0.1上,那么检查ollama的端口是否running,一般按照官方部署都可以进行顺畅进行(只有国内这个网不太顺畅)

    此外Open-WebUi默认检查OpenAi的API,这个选项可以在首次登陆后去管理员面板关闭,这样不会每次启动都遇到拉取模型缓慢、超时的情况。

    4、其他分享

    我的电脑采用13700K 32G DDR5 RTX3070 8G,但大模型运行需要大显存,8G显存只能算起步,参数量只能流畅运行7B左右的模型,因此一般的家用和办公电脑跑大模型都存在很大的限制。

    RTX3070 8G跑DeepSeek-R1:7B的速度——显存爆满,ollama默认设置,显示CPU处理占用10%,GPU处理占用90%,常规问答的response token/s在39左右 ,prompt_token/s在2500左右。但是大模型性能存在一定的短板,长上下文效果不尽如人意。

    RTX3070 8G跑DeepSeek-R1:14B,ollama默认设置命令行中速度可以接受,在WebUi中短回答response token/s约为14,较长的上下文降低到7不到,一半跑在GPU一半跑在CPU,长文本效果很差。

    RTX3070 8G跑DeepSeek-R1:32B,ollama默认设置在命令行中速度还行,缓慢但可以简单对话,处理长文本速度基本不可用。若用13700K跑在CPU则32G内容跑满,速度也是非常慢。

    在跑完Ai测试后,请关闭Ollama的进程,否则你将面临满占用的显存或内存~

    5、体验

    搭配Open-WebUi可以实现本地部署,多端使用,但是对体验影响更大的限制——模型本身——我们个人、及小公司的计算性能均没法有效支撑,本来大模型就是为了提升效率,本地部署一个跑的死慢的模型,对效率的提升实在是存疑。

    当然我鼓励大家都去本地部署体验一下,从中也可以获得一些乐趣,但是如果到实际应用层面,大一些的模型硬件需求激增,小公司玩这个自建后端的硬件成本还是太高了。

    因此,对小公司而言,可能选择一个大树,使用API,保护好自己的数据(真的是有价值的数据吗?)进行针对性的训练,拓展自己的RAG系统,做好本地化的情况下拥抱云计算,才是提升小公司效率的一条路吧。

    但话说回来,小公司真的愿意为这个人工和软件成本付费吗?

  • 【Python】提取视频画面并生成PPT

    比较笨的方法,用来提取PPT课程视频画面,并生成对应的PPT,代码检测黑屏但没有检测白屏,没有检测重复画面(因为有些人讲课会来回翻PPT),因此还有优化空间。内存占用会逐渐增多,不过测试没有出现崩溃的情况。

    PS:做完发现可以直接问讲课人要PPT原件,我,,,

    import cv2
    import os
    import numpy as np
    from pptx import Presentation
    from pptx.util import Inches
    from skimage.metrics import structural_similarity as ssim
    import tkinter as tk
    from tkinter import filedialog, messagebox
    
    # 选择视频和输出目录
    def select_video_and_output():
        video_path = filedialog.askopenfilename(title="选择视频文件", filetypes=[("MP4 files", "*.mp4")])
        if not video_path:
            messagebox.showwarning("选择视频", "未选择视频文件")
            return None, None
        
        output_dir = filedialog.askdirectory(title="选择输出目录")
        if not output_dir:
            messagebox.showwarning("选择输出目录", "未选择输出目录")
            return None, None
    
        pptx_path = os.path.join(output_dir, "output_presentation.pptx")
        return video_path, pptx_path
    
    # 处理视频并生成 PPT
    def process_video_to_ppt(video_path, pptx_path):
        os.makedirs("ppt_images", exist_ok=True)
        
        cap = cv2.VideoCapture(video_path)
        _, prev_frame = cap.read()
        prev_gray = cv2.cvtColor(prev_frame, cv2.COLOR_BGR2GRAY)
    
        frame_count = 0
        slide_count = 0
        images = []
        similarity_threshold = 0.95  # 提高 SSIM 阈值,减少相似图片
        brightness_threshold = 10  # 黑屏检测(平均亮度 < 10 认为是黑屏)
    
        def process_frame(frame):
            """ 计算 SSIM 相似度,判断是否保存该帧 """
            nonlocal prev_gray, slide_count
            gray = cv2.cvtColor(frame, cv2.COLOR_BGR2GRAY)
            score = ssim(prev_gray, gray)
    
            # 计算平均亮度,过滤黑屏
            avg_brightness = np.mean(gray)
            if avg_brightness < brightness_threshold:
                return  # 跳过黑屏帧
    
            if score < similarity_threshold:  
                img_path = os.path.join("ppt_images", f"slide_{slide_count}.jpg")
    
                # 确保不同的幻灯片才保存
                if len(images) == 0 or images[-1] != img_path:  
                    cv2.imwrite(img_path, frame)
                    images.append(img_path)
                    slide_count += 1
                    prev_gray = gray  # 只在确认变化时更新参考帧
    
        while cap.isOpened():
            ret, frame = cap.read()
            if not ret:
                break
    
            # 仅每隔 15 帧处理一次
            if frame_count % 15 == 0:
                process_frame(frame)
    
            frame_count += 1
    
        cap.release()
        # cv2.destroyAllWindows()
    
        # 创建 PPT
        prs = Presentation()
        for img in images:
            slide = prs.slides.add_slide(prs.slide_layouts[5])  # 空白幻灯片
            left, top, width, height = Inches(0), Inches(0), Inches(10), Inches(7.5)
            slide.shapes.add_picture(img, left, top, width, height)
    
        prs.save(pptx_path)
        messagebox.showinfo("完成", f"PPTX 生成完成: {pptx_path}")
    
    # 主函数
    def main():
        root = tk.Tk()
        root.withdraw()  # 隐藏主窗口
        video_path, pptx_path = select_video_and_output()
        if video_path and pptx_path:
            process_video_to_ppt(video_path, pptx_path)
    
    if __name__ == "__main__":
        main()
    
  • 【Python】使用cwebp、gif2webp、exiftool实现保留exif信息的WebP转换

    此前写了个使用cwebp、gif2webp的脚本,但是由于cwebp目前在win的元数据提取存在问题,因此我们可以使用已经支持exif提取和写入的exiftool进行最后一步的转换,这样我们的图片压缩、转码都在官方库得以实现。

    前置条件:

    cwebp、gif2webp、exiftool三个组件都注册到系统环境变量。python则使用pil库用于分辨率获取。

    实现效果:

    使用pil库对分辨率进行获取,但是不介入压缩过程,因为cwebp目前没法获取图片分辨率,使用pil库进行是否执行resize的判断。

    使用cwebp处理静态png、jpg,使用gif2webp处理gif图,启用mt多线程,压缩质量85,resize到2560最长、宽边,exiftool采用”-overwrite_original”来避免生成两个图片。

    测试效果:

    该图片原图7M多,压缩质量选择85,可能由于细节较为丰富,压缩到WebP大小仍为1M左右,还是比较大,不过细节保留充分,同时保留了EXIF信息。

    import tkinter as tk
    from tkinter import filedialog, messagebox
    import os
    import subprocess
    from PIL import Image
    
    def validate_file(input_path):
        input_path = os.path.abspath(input_path)
        if not os.path.exists(input_path):
            raise FileNotFoundError(f"文件 {input_path} 不存在,请检查路径。")
        return input_path
    
    def get_resized_dimensions(width, height, max_size):
        if width > height:
            new_width = max_size
            new_height = int((new_width / width) * height)
        else:
            new_height = max_size
            new_width = int((new_height / height) * width)
        return new_width, new_height
    
    def convert_image(input_path, output_path, new_width=None, new_height=None):
        try:
            file_extension = os.path.splitext(input_path)[1].lower()
            if file_extension == ".gif":
                command = ["gif2webp","mt", input_path, "-o", output_path]
            else:
                if new_width and new_height:
                    command = ["cwebp","mt", "-q", "85", "-resize", str(new_width), str(new_height), input_path, "-o", output_path]
                else:
                    command = ["cwebp","mt", "-q", "85", input_path, "-o", output_path]
            subprocess.run(command, check=True)
        except subprocess.CalledProcessError as e:
            raise RuntimeError(f"转换工具运行出错: {e}")
    
    def embed_exif(input_path, output_path):
        try:
            command = ["exiftool", "-overwrite_original", "-tagsfromfile", input_path, "-all:all", output_path]
            subprocess.run(command, check=True)
        except subprocess.CalledProcessError as e:
            raise RuntimeError(f"EXIF 数据嵌入失败: {e}")
    
    def convert_to_webp(input_path, max_size=2560):
        try:
            # 验证文件路径
            input_path = validate_file(input_path)
            output_path = os.path.splitext(input_path)[0] + ".webp"
    
            # 使用 PIL 获取图像分辨率
            with Image.open(input_path) as img:
                width, height = img.size
                if width <= max_size and height <= max_size:
                    convert_image(input_path, output_path)
                else:
                    new_width, new_height = get_resized_dimensions(width, height, max_size)
                    convert_image(input_path, output_path, new_width, new_height)
    
            # 嵌入 EXIF 数据
            embed_exif(input_path, output_path)
    
            return f"图片已转换并保存为 {output_path}"
    
        except (subprocess.CalledProcessError, FileNotFoundError) as e:
            return str(e)
        except Exception as e:
            return f"处理文件时发生错误: {e}"
    
    def select_files():
        file_paths = filedialog.askopenfilenames(
            title="选择图片文件",
            filetypes=[("*所有图片格式", "*.jpg;*.jpeg;*.png;*.gif"),
                       ("JPEG 图片", "*.jpg;*.jpeg"),
                       ("PNG 图片", "*.png"),
                       ("GIF 图片", "*.gif")]
        )
        if file_paths:
            for path in file_paths:
                file_listbox.insert(tk.END, path)
    
    def convert_and_save_batch():
        files = file_listbox.get(0, tk.END)
        if not files:
            messagebox.showerror("错误", "请选择至少一个图片文件!")
            return
    
        results = [convert_to_webp(file_path) for file_path in files]
        messagebox.showinfo("完成", "\n".join(results))
    
    def clear_list():
        file_listbox.delete(0, tk.END)
    
    root = tk.Tk()
    root.title("批量图片转换为 WebP 工具")
    root.geometry("600x400")
    
    frame = tk.Frame(root)
    frame.pack(pady=10, padx=10, fill=tk.BOTH, expand=True)
    
    scrollbar = tk.Scrollbar(frame, orient=tk.VERTICAL)
    file_listbox = tk.Listbox(frame, selectmode=tk.EXTENDED, yscrollcommand=scrollbar.set)
    scrollbar.config(command=file_listbox.yview)
    scrollbar.pack(side=tk.RIGHT, fill=tk.Y)
    file_listbox.pack(side=tk.LEFT, fill=tk.BOTH, expand=True)
    
    button_frame = tk.Frame(root)
    button_frame.pack(pady=10)
    
    select_button = tk.Button(button_frame, text="选择文件", command=select_files, width=15)
    select_button.grid(row=0, column=0, padx=5)
    
    clear_button = tk.Button(button_frame, text="清空列表", command=clear_list, width=15)
    clear_button.grid(row=0, column=1, padx=5)
    
    convert_button = tk.Button(button_frame, text="批量转换", command=convert_and_save_batch, width=15)
    convert_button.grid(row=0, column=2, padx=5)
    
    root.mainloop()
    
  • 【Python】使用WebP官方库进行WebP转换

    此前的代码使用了Pillow库集成的库,这次使用WebP官方库,对GIF、PNG的处理也比较友好。需要添加WebP的库到系统环境变量后使用。

    功能实现:

    代码使用cwebp、gif2webp两种方式转换不同的格式图片,使用库本身的压缩分辨率方法,压缩图片到2560最长、宽。

    对于gif,该代码可以实现对原图动态的保持,此前使用pillow库则可以设定gif的持续或者最后一帧静帧。

    遗憾:

    没有能够传递exif,win平台中cwebp压根没法有效传递exif信息,显示——Warning: only ICC profile extraction is currently supported on this platform!元数据只有ICC才能支持传递,所以只依靠cwebp是没法很好在win中进行转换的。

    这个问题采用exiftool进行了解决,下篇文章可以看到。

    import tkinter as tk
    from tkinter import filedialog, messagebox
    import os
    import subprocess
    from PIL import Image
    
    def validate_file(input_path):
        input_path = os.path.abspath(input_path)
        if not os.path.exists(input_path):
            raise FileNotFoundError(f"文件 {input_path} 不存在,请检查路径。")
        return input_path
    
    def get_resized_dimensions(width, height, max_size):
        if width > height:
            new_width = max_size
            new_height = int((new_width / width) * height)
        else:
            new_height = max_size
            new_width = int((new_height / height) * width)
        return new_width, new_height
    
    # 使用 cwebp 或 gif2webp 进行转换
    def convert_image(input_path, output_path, new_width=None, new_height=None, cwebp_metadata="none", gif2webp_metadata="none"):
        try:
            file_extension = os.path.splitext(input_path)[1].lower()
            if file_extension == ".gif":
                command = ["gif2webp", "-metadata", gif2webp_metadata, "-mt", input_path, "-o", output_path]
            else:
                if new_width and new_height:
                    command = ["cwebp", "-q", "85", "-resize", str(new_width), str(new_height), "-metadata", cwebp_metadata, "-mt", input_path, "-o", output_path]
                else:
                    command = ["cwebp", "-q", "85", "-metadata", cwebp_metadata, "-mt", input_path, "-o", output_path]
            subprocess.run(command, check=True)
        except subprocess.CalledProcessError as e:
            raise RuntimeError(f"转换工具运行出错: {e}")
    
    def convert_to_webp(input_path, max_size=2560, cwebp_metadata="none", gif2webp_metadata="none"):
        try:
            # 验证文件路径
            input_path = validate_file(input_path)
            output_path = os.path.splitext(input_path)[0] + ".webp"
    
            # 使用 PIL 获取图像分辨率
            with Image.open(input_path) as img:
                width, height = img.size
                if width <= max_size and height <= max_size:
                    convert_image(input_path, output_path, cwebp_metadata=cwebp_metadata, gif2webp_metadata=gif2webp_metadata)
                else:
                    new_width, new_height = get_resized_dimensions(width, height, max_size)
                    convert_image(input_path, output_path, new_width, new_height, cwebp_metadata=cwebp_metadata, gif2webp_metadata=gif2webp_metadata)
    
            return f"图片已转换并保存为 {output_path}"
    
        except (subprocess.CalledProcessError, FileNotFoundError) as e:
            return str(e)
        except Exception as e:
            return f"处理文件时发生错误: {e}"
    
    def select_files():
        file_paths = filedialog.askopenfilenames(
            title="选择图片文件",
            filetypes=[("*所有图片格式", "*.jpg;*.jpeg;*.png;*.gif"),
                       ("JPEG 图片", "*.jpg;*.jpeg"),
                       ("PNG 图片", "*.png"),
                       ("GIF 图片", "*.gif")]
        )
        if file_paths:
            for path in file_paths:
                file_listbox.insert(tk.END, path)
    
    def convert_and_save_batch():
        files = file_listbox.get(0, tk.END)
        if not files:
            messagebox.showerror("错误", "请选择至少一个图片文件!")
            return
    
        cwebp_metadata = "exif"  # 设置cwebp要复制的元数据类型为exif
        gif2webp_metadata = "xmp"  # 设置gif2webp要复制的元数据类型为xmp
        results = [convert_to_webp(file_path, cwebp_metadata=cwebp_metadata, gif2webp_metadata=gif2webp_metadata) for file_path in files]
        messagebox.showinfo("完成", "\n".join(results))
    
    def clear_list():
        file_listbox.delete(0, tk.END)
    
    # 创建主窗口
    root = tk.Tk()
    root.title("批量图片转换为 WebP 工具")
    root.geometry("600x400")
    
    frame = tk.Frame(root)
    frame.pack(pady=10, padx=10, fill=tk.BOTH, expand=True)
    
    scrollbar = tk.Scrollbar(frame, orient=tk.VERTICAL)
    file_listbox = tk.Listbox(frame, selectmode=tk.EXTENDED, yscrollcommand=scrollbar.set)
    scrollbar.config(command=file_listbox.yview)
    scrollbar.pack(side=tk.RIGHT, fill=tk.Y)
    file_listbox.pack(side=tk.LEFT, fill=tk.BOTH, expand=True)
    
    button_frame = tk.Frame(root)
    button_frame.pack(pady=10)
    
    select_button = tk.Button(button_frame, text="选择文件", command=select_files, width=15)
    select_button.grid(row=0, column=0, padx=5)
    
    clear_button = tk.Button(button_frame, text="清空列表", command=clear_list, width=15)
    clear_button.grid(row=0, column=1, padx=5)
    
    convert_button = tk.Button(button_frame, text="批量转换", command=convert_and_save_batch, width=15)
    convert_button.grid(row=0, column=2, padx=5)
    
    root.mainloop()
    
  • 【Python】使用PIL库进行多格式批量转换WebP并压缩分辨率

    网站将逐步切换到WebP格式图片,今天捣鼓了插件在服务器端替换图片,但WP的媒体库却怎么都搞不定了,媒体库会自动生成很多缩略图用于不同的场景,我不想碰它的缩略图生成效果,因此只写单一的转换代码是没法做出完整的效果的。

    退而求其次使用本地对图片进行处理,该脚本使用PIL库,图片分辨率限制为2560最长/宽,可以处理带透明通道的图片,也可以处理GIF,用下来效果还不错。

    1月8日更新:

    【Python】使用WebP官方库进行WebP转换
    【Python】使用cwebp、gif2webp、exiftool实现保留exif信息的WebP转换

    import tkinter as tk
    from tkinter import filedialog, messagebox
    from PIL import Image, ImageSequence
    import os
    
    def resize_image(img):
        max_size = 2560
        width, height = img.size
    
        if width > max_size or height > max_size:
            if width > height:
                new_width = max_size
                new_height = int((new_width / width) * height)
            else:
                new_height = max_size
                new_width = int((new_height / height) * width)
            
            img = img.resize((new_width, new_height), Image.LANCZOS)
        
        return img
    
    def convert_to_webp(input_path):
        try:
            file_extension = os.path.splitext(input_path)[1].lower()
            output_path = os.path.splitext(input_path)[0] + ".webp"
    
            if not os.path.exists(input_path):
                raise FileNotFoundError(f"文件 {input_path} 不存在,请检查路径。")
    
            if file_extension == '.webp':
                return f"文件 {input_path} 已是 WebP 格式,无需转换。"
    
            with Image.open(input_path) as img:
                if file_extension in ['.gif'] and getattr(img, "is_animated", False):
                    frames = []
                    durations = []
                    for frame in ImageSequence.Iterator(img):
                        # 处理透明度
                        if frame.mode == "P":
                            frame = frame.convert("RGBA")
                        
                        # 转换帧为 RGBA 并存储
                        new_frame = frame.copy()
                        frames.append(new_frame)
                        durations.append(frame.info.get('duration', 100))
    
                    # 重复最后一帧
                    if len(frames) > 1:
                        durations[-1] = max(durations[-1], 100) 
    
                    # 保存为动态 WebP
                    frames[0].save(
                        output_path,
                        format="WEBP",
                        save_all=True,
                        append_images=frames[1:],
                        duration=durations,
                        loop=img.info.get('loop', 0),  # 循环次数
                        transparency=0,  # 确保透明度保留
                        quality=85
                    )
                else:
                    # 静态图片处理
                    if img.mode == "P":
                        if "transparency" in img.info:
                            img = img.convert("RGBA")
                        else:
                            img = img.convert("RGB")
    
                    img = resize_image(img)
    
                    if img.mode != "RGBA":
                        img = img.convert("RGBA")
    
                    img.save(output_path, format="WEBP", quality=85)
    
            return f"图片已转换并保存为 {output_path}"
        except Exception as e:
            return f"处理文件时发生错误: {e}"
    
    
    def select_files():
        file_paths = filedialog.askopenfilenames(
            title="选择图片文件",
            filetypes=[("所有图片格式", "*.jpg;*.jpeg;*.png;*.gif;*.webp;*.bmp;*.tiff"), 
                       ("JPEG 图片", "*.jpg;*.jpeg"),
                       ("PNG 图片", "*.png"),
                       ("GIF 图片", "*.gif"),
                       ("WebP 图片", "*.webp"),
                       ("BMP 图片", "*.bmp"),
                       ("TIFF 图片", "*.tiff")]
        )
        if file_paths:
            for path in file_paths:
                file_listbox.insert(tk.END, path)
    
    def convert_and_save_batch():
        files = file_listbox.get(0, tk.END)
        if not files:
            messagebox.showerror("错误", "请选择至少一个图片文件!")
            return
    
        results = []
        for file_path in files:
            result = convert_to_webp(file_path)
            results.append(result)
    
        messagebox.showinfo("完成", "\n".join(results))
    
    def clear_list():
        file_listbox.delete(0, tk.END)
    
    root = tk.Tk()
    root.title("批量图片转换为 WebP 工具")
    root.geometry("600x400")
    
    frame = tk.Frame(root)
    frame.pack(pady=10, padx=10, fill=tk.BOTH, expand=True)
    
    scrollbar = tk.Scrollbar(frame, orient=tk.VERTICAL)
    file_listbox = tk.Listbox(frame, selectmode=tk.EXTENDED, yscrollcommand=scrollbar.set)
    scrollbar.config(command=file_listbox.yview)
    scrollbar.pack(side=tk.RIGHT, fill=tk.Y)
    file_listbox.pack(side=tk.LEFT, fill=tk.BOTH, expand=True)
    
    button_frame = tk.Frame(root)
    button_frame.pack(pady=10)
    
    select_button = tk.Button(button_frame, text="选择文件", command=select_files, width=15)
    select_button.grid(row=0, column=0, padx=5)
    
    clear_button = tk.Button(button_frame, text="清空列表", command=clear_list, width=15)
    clear_button.grid(row=0, column=1, padx=5)
    
    convert_button = tk.Button(button_frame, text="批量转换", command=convert_and_save_batch, width=15)
    convert_button.grid(row=0, column=2, padx=5)
    
    root.mainloop()
  • 【HTML】为网站添加WordPress官网飘雪效果

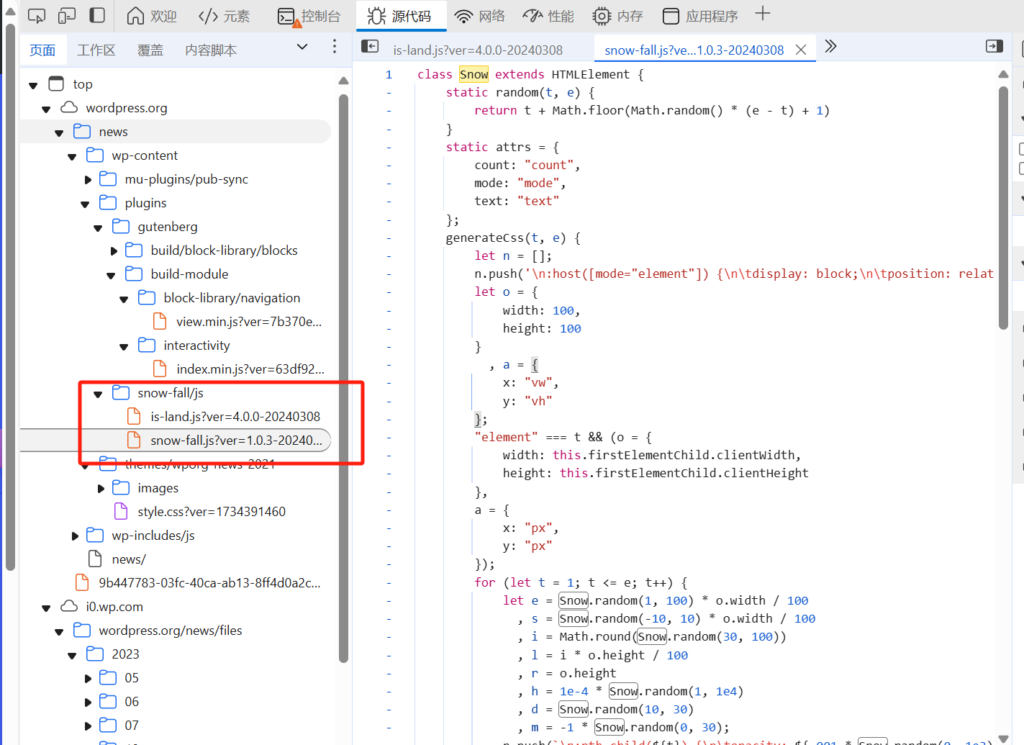
    WordPress官网最近加上了一个飘雪效果,感觉效果相当不错,经过研究后发现他们页面中使用了两个js,而前端只需要用html进行简单调整就可以自定义,可玩性很强。

    我们也可以在自己的网站中使用这个效果,首先在Wordpress官网下载到is-land及snow-fall这俩js。

    通过模板函数对is-land与snow-fall先后加载:

    // js来源自Wordpress官网
    function enqueue_island_assets() {
        wp_enqueue_script(
            'island-js',
            get_template_directory_uri() . '/island.js', 
            true
        );
    }
    add_action('wp_enqueue_scripts', 'enqueue_island_assets');
    wp_enqueue_script(
        'snow-fall-js',
        get_template_directory_uri() . '/snow-fall.js',
        array('island-js'), // 设置依赖
        true
    );

    前端通过html进行调用,我们通过后面的分析可以发现其为前端预留了多个参数调节,比如我想在页面呈现❄飘落,而不是原版的圆点,只需要调整text的值,写成如下即可:

    <is-land on:media="(prefers-reduced-motion: no-preference)" on:idle="">
        <snow-fall mode="page" text="❄"></snow-fall>
    </is-land>

    2025-1-6更新:如果不需要island里面的一些参数,那么直接引入snow-fall也是可以的:

    // island及snowfall的Js文件来自Wordpress官网
    function enqueue_snowfall() {
        wp_enqueue_script(
            'snow-fall-js',
            get_template_directory_uri() . '/snow-fall.js', 
            true
        );
    }
    add_action('wp_enqueue_scripts', 'enqueue_snowfall');
    <snow-fall mode="page" text="❄"></snow-fall>

    目前网站采用直接引入Snow-fall的方式展示。


    后续是源码及一些可以调用的参数信息:

    其中is-land的源码如下:

    class Island extends HTMLElement {
        static tagName = "is-land";
        static prefix = "is-land--";
        static attr = {
            template: "data-island",
            ready: "ready",
            defer: "defer-hydration"
        };
        static onceCache = new Map;
        static onReady = new Map;
        static fallback = {
            ":not(is-land,:defined,[defer-hydration])": (e, t, a) => {
                let n = document.createElement(a + t.localName);
                for (let e of t.getAttributeNames())
                    n.setAttribute(e, t.getAttribute(e));
                let i = t.shadowRoot;
                if (!i) {
                    let e = t.querySelector(":scope > template:is([shadowrootmode], [shadowroot])");
                    if (e) {
                        let a = e.getAttribute("shadowrootmode") || e.getAttribute("shadowroot") || "closed";
                        i = t.attachShadow({
                            mode: a
                        }),
                        i.appendChild(e.content.cloneNode(!0))
                    }
                }
                return i && n.attachShadow({
                    mode: i.mode
                }).append(...i.childNodes),
                n.append(...t.childNodes),
                t.replaceWith(n),
                e.then(( () => {
                    n.shadowRoot && t.shadowRoot.append(...n.shadowRoot.childNodes),
                    t.append(...n.childNodes),
                    n.replaceWith(t)
                }
                ))
            }
        };
        constructor() {
            super(),
            this.ready = new Promise((e => {
                this.readyResolve = e
            }
            ))
        }
        static getParents(e, t=!1) {
            let a = [];
            for (; e; ) {
                if (e.matches && e.matches(Island.tagName)) {
                    if (t && e === t)
                        break;
                    Conditions.hasConditions(e) && a.push(e)
                }
                e = e.parentNode
            }
            return a
        }
        static async ready(e, t) {
            if (t || (t = Island.getParents(e)),
            0 === t.length)
                return;
            let a = await Promise.all(t.map((e => e.wait())));
            return a.length ? a[0] : void 0
        }
        forceFallback() {
            window.Island && Object.assign(Island.fallback, window.Island.fallback);
            for (let e in Island.fallback) {
                let t = Array.from(this.querySelectorAll(e)).reverse();
                for (let a of t) {
                    if (!a.isConnected)
                        continue;
                    let t = Island.getParents(a);
                    if (1 === t.length) {
                        let n = Island.ready(a, t);
                        Island.fallback[e](n, a, Island.prefix)
                    }
                }
            }
        }
        wait() {
            return this.ready
        }
        async connectedCallback() {
            Conditions.hasConditions(this) && this.forceFallback(),
            await this.hydrate()
        }
        getTemplates() {
            return this.querySelectorAll(`template[${Island.attr.template}]`)
        }
        replaceTemplates(e) {
            for (let t of e) {
                if (Island.getParents(t, this).length > 0)
                    continue;
                let e = t.getAttribute(Island.attr.template);
                if ("replace" === e) {
                    let e = Array.from(this.childNodes);
                    for (let t of e)
                        this.removeChild(t);
                    this.appendChild(t.content);
                    break
                }
                {
                    let a = t.innerHTML;
                    if ("once" === e && a) {
                        if (Island.onceCache.has(a))
                            return void t.remove();
                        Island.onceCache.set(a, !0)
                    }
                    t.replaceWith(t.content)
                }
            }
        }
        async hydrate() {
            let e = [];
            this.parentNode && e.push(Island.ready(this.parentNode));
            let t = Conditions.getConditions(this);
            for (let a in t)
                Conditions.map[a] && e.push(Conditions.map[a](t[a], this));
            await Promise.all(e),
            this.replaceTemplates(this.getTemplates());
            for (let e of Island.onReady.values())
                await e.call(this, Island);
            this.readyResolve(),
            this.setAttribute(Island.attr.ready, ""),
            this.querySelectorAll(`[${Island.attr.defer}]`).forEach((e => e.removeAttribute(Island.attr.defer)))
        }
    }
    class Conditions {
        static map = {
            visible: Conditions.visible,
            idle: Conditions.idle,
            interaction: Conditions.interaction,
            media: Conditions.media,
            "save-data": Conditions.saveData
        };
        static hasConditions(e) {
            return Object.keys(Conditions.getConditions(e)).length > 0
        }
        static getConditions(e) {
            let t = {};
            for (let a of Object.keys(Conditions.map))
                e.hasAttribute(`on:${a}`) && (t[a] = e.getAttribute(`on:${a}`));
            return t
        }
        static visible(e, t) {
            if ("IntersectionObserver"in window)
                return new Promise((e => {
                    let a = new IntersectionObserver((t => {
                        let[n] = t;
                        n.isIntersecting && (a.unobserve(n.target),
                        e())
                    }
                    ));
                    a.observe(t)
                }
                ))
        }
        static idle() {
            let e = new Promise((e => {
                "complete" !== document.readyState ? window.addEventListener("load", ( () => e()), {
                    once: !0
                }) : e()
            }
            ));
            return "requestIdleCallback"in window ? Promise.all([new Promise((e => {
                requestIdleCallback(( () => {
                    e()
                }
                ))
            }
            )), e]) : e
        }
        static interaction(e, t) {
            let a = ["click", "touchstart"];
            return e && (a = (e || "").split(",").map((e => e.trim()))),
            new Promise((e => {
                function n(i) {
                    e();
                    for (let e of a)
                        t.removeEventListener(e, n)
                }
                for (let e of a)
                    t.addEventListener(e, n, {
                        once: !0
                    })
            }
            ))
        }
        static media(e) {
            let t = {
                matches: !0
            };
            if (e && "matchMedia"in window && (t = window.matchMedia(e)),
            !t.matches)
                return new Promise((e => {
                    t.addListener((t => {
                        t.matches && e()
                    }
                    ))
                }
                ))
        }
        static saveData(e) {
            if ("connection"in navigator && navigator.connection.saveData !== ("false" !== e))
                return new Promise(( () => {}
                ))
        }
    }
    "customElements"in window && (window.customElements.define(Island.tagName, Island),
    window.Island = Island);
    export {Island, Island as component};
    export const ready = Island.ready;

    通过前端代码调用:

    <is-land on:media="(prefers-reduced-motion: no-preference)" on:idle="" ready="">
    <snow-fall mode="page"></snow-fall>
    </is-land>

    其中可以定义:

    on:media:当满足媒体查询条件时加载内容。

    on:idle:在浏览器空闲时间或页面完全加载后执行。

    on:visible:当标签内容滚动到视口中时加载。

    on:interaction:在用户交互(如点击、触摸)后加载。

    on:save-data:根据设备的省流量模式决定是否加载内容。

    对于snow-fall.js,源码如下:

    class Snow extends HTMLElement {
        static random(t, e) {
            return t + Math.floor(Math.random() * (e - t) + 1)
        }
        static attrs = {
            count: "count",
            mode: "mode",
            text: "text"
        };
        generateCss(t, e) {
            let n = [];
            n.push('\n:host([mode="element"]) {\n\tdisplay: block;\n\tposition: relative;\n\toverflow: hidden;\n}\n:host([mode="page"]) {\n\tposition: fixed;\n\ttop: 0;\n\tleft: 0;\n\tright: 0;\n}\n:host([mode="page"]),\n:host([mode="element"]) > * {\n\tpointer-events: none;\n}\n:host([mode="element"]) ::slotted(*) {\n\tpointer-events: all;\n}\n* {\n\tposition: absolute;\n}\n:host([text]) * {\n\tfont-size: var(--snow-fall-size, 1em);\n}\n:host(:not([text])) * {\n\twidth: var(--snow-fall-size, 10px);\n\theight: var(--snow-fall-size, 10px);\n\tbackground: var(--snow-fall-color, rgba(255,255,255,.5));\n\tborder-radius: 50%;\n}\n');
            let o = {
                width: 100,
                height: 100
            }
              , a = {
                x: "vw",
                y: "vh"
            };
            "element" === t && (o = {
                width: this.firstElementChild.clientWidth,
                height: this.firstElementChild.clientHeight
            },
            a = {
                x: "px",
                y: "px"
            });
            for (let t = 1; t <= e; t++) {
                let e = Snow.random(1, 100) * o.width / 100
                  , s = Snow.random(-10, 10) * o.width / 100
                  , i = Math.round(Snow.random(30, 100))
                  , l = i * o.height / 100
                  , r = o.height
                  , h = 1e-4 * Snow.random(1, 1e4)
                  , d = Snow.random(10, 30)
                  , m = -1 * Snow.random(0, 30);
                n.push(`\n:nth-child(${t}) {\n\topacity: ${.001 * Snow.random(0, 1e3)};\n\ttransform: translate(${e}${a.x}, -10px) scale(${h});\n\tanimation: fall-${t} ${d}s ${m}s linear infinite;\n}\n\n@keyframes fall-${t} {\n\t${i}% {\n\t\ttransform: translate(${e + s}${a.x}, ${l}${a.y}) scale(${h});\n\t}\n\n\tto {\n\t\ttransform: translate(${e + s / 2}${a.x}, ${r}${a.y}) scale(${h});\n\t}\n}`)
            }
            return n.join("\n")
        }
        connectedCallback() {
            if (this.shadowRoot || !("replaceSync"in CSSStyleSheet.prototype))
                return;
            let t, e = parseInt(this.getAttribute(Snow.attrs.count)) || 100;
            this.hasAttribute(Snow.attrs.mode) ? t = this.getAttribute(Snow.attrs.mode) : (t = this.firstElementChild ? "element" : "page",
            this.setAttribute(Snow.attrs.mode, t));
            let n = new CSSStyleSheet;
            n.replaceSync(this.generateCss(t, e));
            let o = this.attachShadow({
                mode: "open"
            });
            o.adoptedStyleSheets = [n];
            let a = document.createElement("div")
              , s = this.getAttribute(Snow.attrs.text);
            a.innerText = s || "";
            for (let t = 0, n = e; t < n; t++)
                o.appendChild(a.cloneNode(!0));
            o.appendChild(document.createElement("slot"))
        }
    }
    customElements.define("snow-fall", Snow);
    

    其定义了一个自定义 HTML 元素 <snow-fall>,用于实现落雪效果。

    我们可以通过改变js中的一些数值来变更效果,例如

    static attrs = { count: “count”, mode: “mode”, text: “text” };

    count:雪花的数量,默认值是 100。

    mode:两种模式:

    1、element:作用于某个特定元素。

    2、page:覆盖整个页面。

    text:雪花的文本内容(默认为空,显示为圆形点)。

    page模式目前已经满足使用,如果想使用element模式目前似乎会出现firstElementChild 为空或未能正确获取其 clientWidth,导致 generateCss 方法出错。如何正确使用element模式还需要探究。

    通过 generateCss(t, e) { 动态生成CSS,可以定义:

    1、:host([mode=”element”]) 和 :host([mode=”page”]) 用于适配不同模式。

    2、雪花的大小由 –snow-fall-size 决定,颜色由 –snow-fall-color 决定。

    动态生成每个雪花的动画样式:

    1、起始位置:translate(${e}${a.x}, -10px)

    2、随机透明度:opacity

    3、动画时长:animation: fall-${t} ${d}s ${m}s linear infinite;

    4、动画帧 @keyframes: 中间位置:随机 x 偏移,随机 y 偏移。最终位置:完全落到底部。
  • 【Python】对本地网页进行元素提取并输出Excel

    一些网页通过加载Js来保护页面元素,当我们突破Js得到本地页面时,可以使用BS4库对页面进行分析,提取对应的元素来综合有价值的内容。

    示例代码:

    import requests
    from bs4 import BeautifulSoup
    import pandas as pd
    
    # 发送请求并获取网页内容
    url = 'your_local_or_online_page_url'
    response = requests.get(url)
    soup = BeautifulSoup(response.text, 'html.parser')
    
    # 定义一个空的列表来存储提取的数据
    data = []
    
    # 遍历页面中的项目列表,假设项目数据都在某个父元素中
    projects = soup.find_all('tr', class_='project-id')  # 根据实际情况修改选择器
    
    # 提取每个项目的各项数据
    for project in projects:
        # 获取项目ID
        project_id = project.find('td', class_='project-id-class').get_text(strip=True)  # 修改为实际选择器
        
        # 将提取的数据添加到列表中
        data.append([project_id]) # 按实际修改
    
    # 创建 DataFrame 并保存为 Excel
    df = pd.DataFrame(data, columns=['ID']) # 按实际修改
    df.to_excel('projects_data.xlsx', index=False)
    
    print("Data has been successfully extracted and saved to 'projects_data.xlsx'.")

    主要用到了BS4库。

    示意代码:

    from bs4 import BeautifulSoup
    
    # 假设有一个HTML文档
    html_doc = """
    <html>
      <head><title>Example Page</title></head>
      <body>
        <p class="title"><b>Sample Page</b></p>
        <p class="story">This is a test story. <a href="http://example.com/1" class="link">link1</a> <a href="http://example.com/2" class="link">link2</a></p>
        <p class="story">Another test story.</p>
      </body>
    </html>
    """
    
    # 使用 BeautifulSoup 解析 HTML 文档
    soup = BeautifulSoup(html_doc, 'html.parser')
    
    # 提取<title>标签的内容
    title = soup.title.string
    print(f"Title: {title}")
    
    # 提取所有的链接(<a> 标签)
    links = soup.find_all('a')
    for link in links:
        print(f"Link text: {link.string}, URL: {link['href']}")
    
    # 查找特定类的<p>标签
    story_paragraphs = soup.find_all('p', class_='story')
    for p in story_paragraphs:
        print(f"Story paragraph: {p.get_text()}")

  • 【HTML】iframe小工具——提取嵌入链接并重设参数

    一般类似YouTube、Bilibili的分享链接,都设置了各自网站的相应参数,为了快速提取其src内容并自定义部分参数,可以使用该小工具进行快速设置。

    操作区
    预览展示区
    查看代码

    <style>
            textarea, input, select {
                width: 100%;
                margin-bottom: 10px;
                padding: 5px;
                font-size: 14px;
            }
            button {
                font-size: 16px;
                margin-bottom: 10px;
                padding: 5px 10px;
            }
            .link-container {
                margin-top: 10px;
            }
            .link-item {
                margin-bottom: 5px;
            }
            .iframe-preview {
                margin-top: 20px;
                padding: 10px;
                border: 1px solid #ddd;
                background: #f9f9f9;
            }
            .iframe-preview pre {
                font-size: 14px;
                background: #e9e9e9;
                padding: 10px;
                border-radius: 5px;
            }
            .row {
                display: flex;
                flex-wrap: wrap;
                gap: 10px;
            }
            .col {
                flex: 1 1 20%;
            }
            .col input, .col select {
                width: 100%;
            }
            .unit-select {
                width: 10px; /*缩小单位选择框宽度*/
            }
            .empty-option {
                font-size: 14px;
            }
            #iframePreviewContainer {
                margin-top: 20px;
            }
        </style>
    </head>
    <body>
        <!-- 输入框 -->
        <textarea id="iframeInput" placeholder="在此输入多个 iframe 代码"></textarea>
        <button id="extractButton">提取链接</button>
    
        <!-- 链接展示区 -->
        <div id="result" class="link-container"></div>
    
        <!-- 单个链接操作区 -->
        <h2>操作区</h2>
        <input id="selectedLink" type="text" placeholder="点击复制按钮后,链接将填入此处" readonly>
        
        <!-- iframe 属性设置 -->
        <div class="row">
            <div class="col">
                <label for="iframeTitle">标题:</label>
                <input id="iframeTitle" type="text" placeholder="请输入 iframe 标题">
            </div>
            <div class="col">
                <label for="iframeWidth">宽度:</label>
                <input id="iframeWidth" type="text" placeholder="例如 560">
            </div>
            <div class="col">
                <label for="iframeWidthUnit">宽度单位:</label>
                <select id="iframeWidthUnit" class="unit-select">
                    <option value="px">px</option>
                    <option value="%">%</option>
                    <option value="vw">vw</option>
                </select>
            </div>
            <div class="col">
                <label for="iframeHeight">高度:</label>
                <input id="iframeHeight" type="text" placeholder="例如 315">
            </div>
            <div class="col">
                <label for="iframeHeightUnit">高度单位:</label>
                <select id="iframeHeightUnit" class="unit-select">
                    <option value="px">px</option>
                    <option value="%">%</option>
                    <option value="vh">vh</option>
                </select>
            </div>
        </div>
    
        <div class="row">
            <div class="col">
                <label for="iframeFullscreen">允许全屏:</label>
                <select id="iframeFullscreen">
                    <option value="allowfullscreen">是</option>
                    <option value="">否</option>
                </select>
            </div>
            <div class="col">
                <label for="iframeReferrer">Referrer Policy:</label>
                <select id="iframeReferrer">
                    <option value="no-referrer">不发送</option>
                    <option value="no-referrer-when-downgrade">仅同源</option>
                    <option value="origin">仅发送源</option>
                    <option value="origin-when-cross-origin">跨源时发送源</option>
                    <option value="same-origin">同源发送完整路径</option>
                    <option value="strict-origin">严格同源发送源</option>
                    <option value="strict-origin-when-cross-origin">默认(严格同源)</option>
                    <option value="unsafe-url">发送完整 URL</option>
                    <option value="">保持空值</option>
                </select>
            </div>
            <div class="col">
                <label for="iframeLoading">加载方式:</label>
                <select id="iframeLoading">
                    <option value="eager">立即加载</option>
                    <option value="lazy">懒加载</option>
                    <option value="">保持空值</option>
                </select>
            </div>
            <div class="col">
                <label for="iframeAutoplay">自动播放:</label>
                <select id="iframeAutoplay">
                    <option value="autoplay">是</option>
                    <option value="">否</option>
                </select>
            </div>
        </div>
    
        <div class="row">
            <div class="col">
                <label for="iframeEncrypted">加密媒体:</label>
                <select id="iframeEncrypted">
                    <option value="encrypted-media">是</option>
                    <option value="">否</option>
                </select>
            </div>
            <div class="col">
                <label for="iframePictureInPicture">画中画:</label>
                <select id="iframePictureInPicture">
                    <option value="picture-in-picture">是</option>
                    <option value="">否</option>
                </select>
            </div>
            <div class="col">
                <label for="iframeWebShare">Web分享:</label>
                <select id="iframeWebShare">
                    <option value="web-share">是</option>
                    <option value="">否</option>
                </select>
            </div>
        </div>
    
        <!-- 生成 iframe 和复制按钮 -->
        <div>
            <button id="generateIframeButton">生成 iframe 嵌入代码</button>
            <button id="copyIframeButton">复制生成代码</button>
        </div>
    
        <!-- iframe 代码展示 -->
        <div id="generatedIframe" class="iframe-preview">
            <textarea id="iframeCodeText" readonly rows="10"></textarea>
        </div>
    
        <!-- iframe 预览展示区 -->
        <div id="iframePreviewContainer" class="iframe-preview">
            <h2>预览展示区</h2>
            <iframe id="iframePreview" src="" width="560" height="315" style="border: none;"></iframe>
        </div>
    
        <script>
            // 缓存常用的 DOM 元素
            const iframeWidthInput = document.getElementById('iframeWidth');
            const iframeHeightInput = document.getElementById('iframeHeight');
            const iframeWidthUnit = document.getElementById('iframeWidthUnit');
            const iframeHeightUnit = document.getElementById('iframeHeightUnit');
            const selectedLinkInput = document.getElementById('selectedLink');
            const iframeFullscreenSelect = document.getElementById('iframeFullscreen');
            const iframeReferrerSelect = document.getElementById('iframeReferrer');
            const iframeLoadingSelect = document.getElementById('iframeLoading');
            const iframeAutoplaySelect = document.getElementById('iframeAutoplay');
            const iframeEncryptedSelect = document.getElementById('iframeEncrypted');
            const iframePictureInPictureSelect = document.getElementById('iframePictureInPicture');
            const iframeWebShareSelect = document.getElementById('iframeWebShare');
            const iframeTitleInput = document.getElementById('iframeTitle');
            const generateIframeButton = document.getElementById('generateIframeButton');
            const copyIframeButton = document.getElementById('copyIframeButton');
            const iframeCodeText = document.getElementById('iframeCodeText');
            const iframePreview = document.getElementById('iframePreview');
            const resultDiv = document.getElementById('result');
    
            // 提取 iframe src 链接
            function extractSrc() {
                const input = document.getElementById('iframeInput').value;
                resultDiv.innerHTML = ''; // 清空之前的结果
    
                const srcMatches = [...input.matchAll(/src="([^"]+)"/g)];
                if (srcMatches.length > 0) {
                    const srcLinks = srcMatches.map(match => match[1]);
    
                    srcLinks.forEach(link => {
                        const linkItem = createLinkItem(link);
                        resultDiv.appendChild(linkItem);
                    });
                } else {
                    resultDiv.textContent = '没有找到有效的 iframe 链接';
                }
            }
    
            // 创建链接项
            function createLinkItem(link) {
                const div = document.createElement('div');
                div.classList.add('link-item');
    
                const textNode = document.createTextNode(link);
                const copyButton = document.createElement('button');
                copyButton.textContent = '复制';
                copyButton.onclick = function() {
                    selectedLinkInput.value = link;
                };
    
                div.appendChild(textNode);
                div.appendChild(copyButton);
                return div;
            }
    
            // 生成 iframe 代码
            function generateIframeCode() {
                const width = iframeWidthInput.value;
                const height = iframeHeightInput.value;
                const widthUnit = iframeWidthUnit.value;
                const heightUnit = iframeHeightUnit.value;
                const title = iframeTitleInput.value;
                const src = selectedLinkInput.value;
                const fullscreen = iframeFullscreenSelect.value;
                const referrer = iframeReferrerSelect.value;
                const loading = iframeLoadingSelect.value;
                const autoplay = iframeAutoplaySelect.value;
                const encrypted = iframeEncryptedSelect.value;
                const pictureInPicture = iframePictureInPictureSelect.value;
                const webShare = iframeWebShareSelect.value;
    
                let iframeCode = `<iframe src="${src}"`;
    
                if (title) {
                    iframeCode += ` title="${title}"`;
                }
                iframeCode += ` width="${width}${widthUnit}" height="${height}${heightUnit}"`;
    
                if (fullscreen) {
                    iframeCode += ` ${fullscreen}`;
                }
    
                if (referrer) {
                    iframeCode += ` referrerpolicy="${referrer}"`;
                }
    
                if (loading) {
                    iframeCode += ` loading="${loading}"`;
                }
    
                if (autoplay) {
                    iframeCode += ` ${autoplay}`;
                }
    
                if (encrypted) {
                    iframeCode += ` ${encrypted}`;
                }
    
                if (pictureInPicture) {
                    iframeCode += ` ${pictureInPicture}`;
                }
    
                if (webShare) {
                    iframeCode += ` ${webShare}`;
                }
    
                iframeCode += '></iframe>';
    
                iframeCodeText.value = iframeCode;
                iframePreview.src = src;
            }
    
            // 复制代码到剪贴板
            function copyIframeCode() {
                iframeCodeText.select();
                document.execCommand('copy');
            }
    
            // 事件监听
            document.getElementById('extractButton').addEventListener('click', extractSrc);
            generateIframeButton.addEventListener('click', generateIframeCode);
            copyIframeButton.addEventListener('click', copyIframeCode);
        </script>
    </body>
  • 【Python】裁切图片为指定画幅比例

    该工具是在截取MTV的画面时产生的需求,一些4:3画幅的视频制作时候加入了黑边,成了16:9视频,因此想截图出原本4:3的画面,一方面可以进剪辑软件进行直接裁剪,也可以在原视频进行导出后操作,考虑到二压费时费力,因此选择对截取的图片进行批处理。

    import os
    import random
    import string
    from tkinter import Tk, filedialog, Button, Label, messagebox
    from PIL import Image
    
    
    def random_filename(extension):
        """生成随机文件名"""
        chars = string.ascii_letters + string.digits
        return ''.join(random.choices(chars, k=8)) + f".{extension}"
    
    
    def crop_to_aspect(image, target_ratio=4/3):
        """裁剪图像宽边以符合指定宽高比"""
        width, height = image.size
        current_ratio = width / height
    
        if current_ratio > target_ratio:  # 如果宽高比大于目标比例,宽度过大
            new_width = int(height * target_ratio)  # 计算符合比例的新宽度
            left = (width - new_width) // 2  # 左侧裁剪量
            right = left + new_width  # 右侧裁剪量
            image = image.crop((left, 0, right, height))  # 裁剪左右宽边
    
        return image
    
    
    def process_images():
        """处理图片并保存结果"""
        input_files = filedialog.askopenfilenames(
            title="选择图片文件",
            filetypes=[("Image Files", "*.jpg *.png")]
        )
        if not input_files:
            return
    
        output_dir = filedialog.askdirectory(title="选择输出文件夹")
        if not output_dir:
            return
    
        for file_path in input_files:
            try:
                with Image.open(file_path) as img:
                    # 转换为符合比例的图片
                    processed_img = crop_to_aspect(img)
                    # 保存文件
                    ext = file_path.split('.')[-1]
                    output_path = os.path.join(output_dir, random_filename(ext))
                    processed_img.save(output_path)
            except Exception as e:
                messagebox.showerror("错误", f"处理文件 {file_path} 时出错: {e}")
                continue
    
        messagebox.showinfo("完成", "图片批量处理完成!")
    
    
    def create_gui():
        """创建GUI"""
        root = Tk()
        root.title("图片批量处理工具")
        root.geometry("400x200")
    
        Label(root, text="批量处理图片 - 保持高度裁切宽边为4:3比例").pack(pady=20)
        Button(root, text="选择图片并处理", command=process_images).pack(pady=10)
        Button(root, text="退出", command=root.quit).pack(pady=10)
    
        root.mainloop()
    
    
    if __name__ == "__main__":
        create_gui()

  • 【HTML】输入Pixiv ID跳转对应画师主页

    Pixiv的应用内部居然没这个功能,不科学,非常基础的功能。

    收录进了小工具页面。👉点击使用小工具

    <body>
        <h1>Pixiv用户跳转</h1>
        <input id="input-id" type="text" placeholder="请输入数字ID" oninput="validateInput()" />
        <div>
            <button onclick="generateLink()">生成链接</button>
            <button onclick="openLink()">跳转</button>
        </div>
        <div id="output"></div>
    
        <script>
            function validateInput() {
                const input = document.getElementById('input-id');
                input.value = input.value.replace(/\D/g, ''); // 只保留数字
            }
    
            function generateLink() {
                const input = document.getElementById('input-id').value.trim();
                const output = document.getElementById('output');
                if (input === '') {
                    output.innerHTML = '<p style="color: red;">请输入有效的数字ID!</p>';
                    return;
                }
                const link = `https://www.pixiv.net/member.php?id=${input}`;
                output.innerHTML = `<a href="${link}" target="_blank">点击跳转到 Pixiv 用户页面</a>`;
            }
    
            function openLink() {
                const input = document.getElementById('input-id').value.trim();
                if (input === '') {
                    alert('您还没有输入ID~');
                    return;
                }
                const link = `https://www.pixiv.net/member.php?id=${input}`;
                window.open(link, '_blank');
            }
        </script>
    </body>